How to Restore Old Photos with AI: A Complete 2026 Guide
Restore, repair, and reconstruct old photos with AI — remove scratches, fix fading, rebuild torn areas, sharpen faces, and colorize black-and-white pictures. Step-by-step, with the settings that actually work.
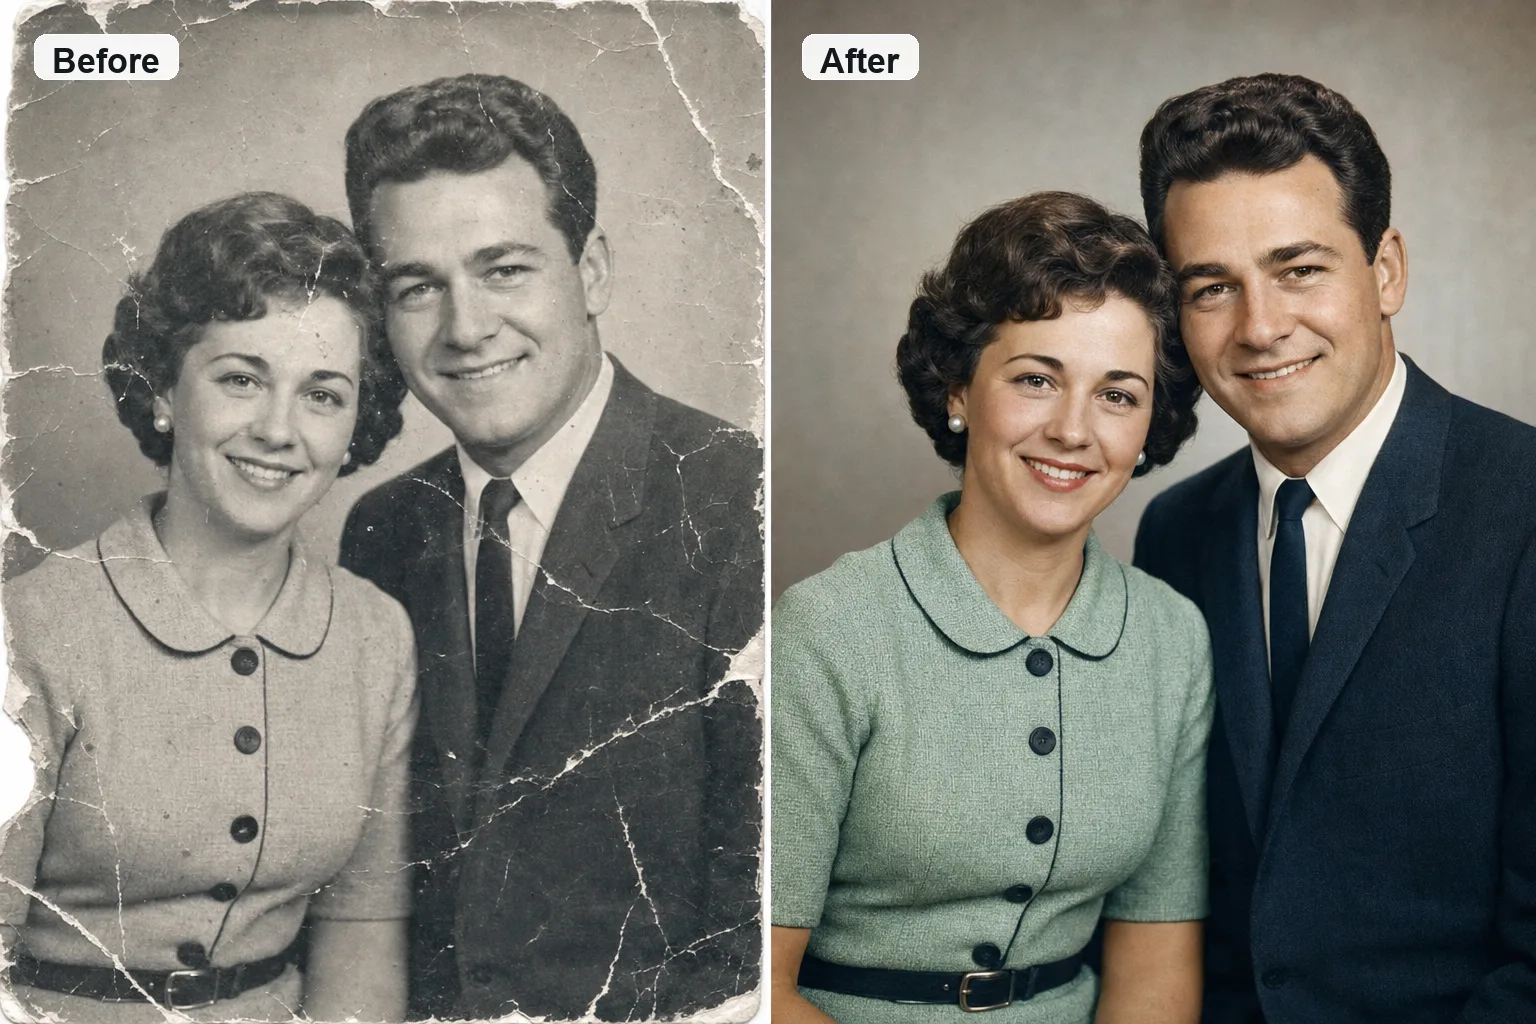
Old family photos don't age gracefully. Prints fade, corners tear, scratches cut across faces, and the black-and-white ones lose the warmth of the moment they captured. AI photo restoration can undo most of that damage in seconds — but only if you feed it the right input and ask for the right thing. This guide walks through the whole process: repair, reconstruction, colorization, and the settings that keep the people looking like themselves.
Restoration, repair, or reconstruction — what you actually need
These three words get used interchangeably, but they're different jobs, and knowing which one you need changes how you prompt:
- Photo repair — the light touch. Removing scratches, dust, stains, and creases from a picture that's otherwise intact. This is what most "restore old photos" requests really are.
- Photo restoration — the full pass. Repair plus fixing faded contrast and color, sharpening soft faces, and bringing back detail that time flattened.
- Photo reconstruction — the hard case. Rebuilding parts that are physically gone: a torn-off corner, a missing edge, a face half-destroyed by water damage. The AI infers what belonged there from what survives.
Avyn AI's photo restoration tool handles all three with presets, but your results depend on which one the picture truly needs. Over-restoring a lightly-damaged photo can erase authentic grain; under-restoring a badly torn one leaves the reconstruction half-done.
Step 1: Get the best possible scan
Everything downstream depends on this. The AI can only restore what it can see, so a bad capture of the original caps your quality before you start.
- Scan flat and even. A flatbed scanner at 600 DPI beats a phone photo. If you only have a phone, lay the print on a flat surface in soft, even daylight — no flash, no angle, no shadow across the picture.
- Fill the frame. Crop to the photo edges. Don't waste resolution on the table around it.
- Don't pre-edit. Skip the phone's auto-enhance. The restoration model wants the honest, damaged original, not a filtered version.
A clean scan of a damaged photo restores far better than a blurry scan of a clean one.
Step 2: Repair the damage
Upload the scan to the AI photo restoration tool and start with the Full restore preset. The single most important part of the prompt is what you tell it not to change:
Remove scratches, stains, and creases. Fix the fading. Keep every face, expression, and the scene exactly the same.
That second sentence is why restored photos stay recognizable. Without it, the model takes creative liberties — a slightly different nose, a changed expression — and suddenly it's not your grandmother anymore. Name the specific damage too: "heavy scratches on the left side, a crease across the middle, faded colors." Specific instructions produce specific fixes.
For pictures that need reconstruction — a torn corner or missing edge — say so directly: "rebuild the torn bottom-left corner to match the background." Reconstruction works when enough of the original survives for the model to infer what belongs there. Faces and simple backgrounds rebuild well; a face that's more than half gone will be estimated, so review it carefully.
Step 3: Colorize (optional)
Colorizing black-and-white pictures is the step that makes people gasp — a grandparent's wedding photo in believable color for the first time. Use the Colorize preset, and guide it with anything you actually know:
Colorize this 1950s photo with natural, era-appropriate color. The dress was blue, the walls were cream.
The model picks realistic skin tones and period-appropriate palettes on its own, but real details you remember ("the uniform was army green") pull it toward the truth instead of a plausible guess. When you don't know, let it choose — modern colorization is surprisingly good at reading context.
Step 4: Review before you trust it
AI restoration is inference, not magic recovery. Before printing or sharing, put the restored version next to the original and check the three things the model is most likely to have changed:
- Faces — identity and expression. This is where drift hides.
- Reconstructed areas — anything that was torn or missing is a best guess, not recovered fact.
- Colorized details — plausible ≠ accurate. Fine for a keepsake; flag it if the color matters historically.
For a family keepsake, "beautifully plausible" is exactly what you want. For an archival or historical record, note which parts were reconstructed or colorized so the estimate isn't mistaken for the original.
Which model does the restoring
Avyn AI runs restoration through its editing models on one shared credit balance. Two are worth knowing:
- Nano Banana Pro — the strongest at preserving faces through heavy repair and reconstruction. Reach for it on the photos that matter most.
- Nano Banana — faster and cheaper for lighter repair jobs where the damage is mostly surface scratches and fading.
Per-image credit costs are on each model page, and new accounts start with free credits — enough to restore your first photos before deciding on a plan.
The short version
- Scan flat and clean — a good capture of the damaged original is half the result.
- Repair with the invariant locked — "keep every face and the scene exactly the same."
- Reconstruct only what's missing, and review it as an estimate.
- Colorize with the details you remember, let the model handle the rest.
- Compare with the original before you print.
Ready to bring an old photo back? Open the AI photo restoration tool and start with one from the shoebox.